QIDI Plus 4 Bed Mesh Correction Process
Introduction
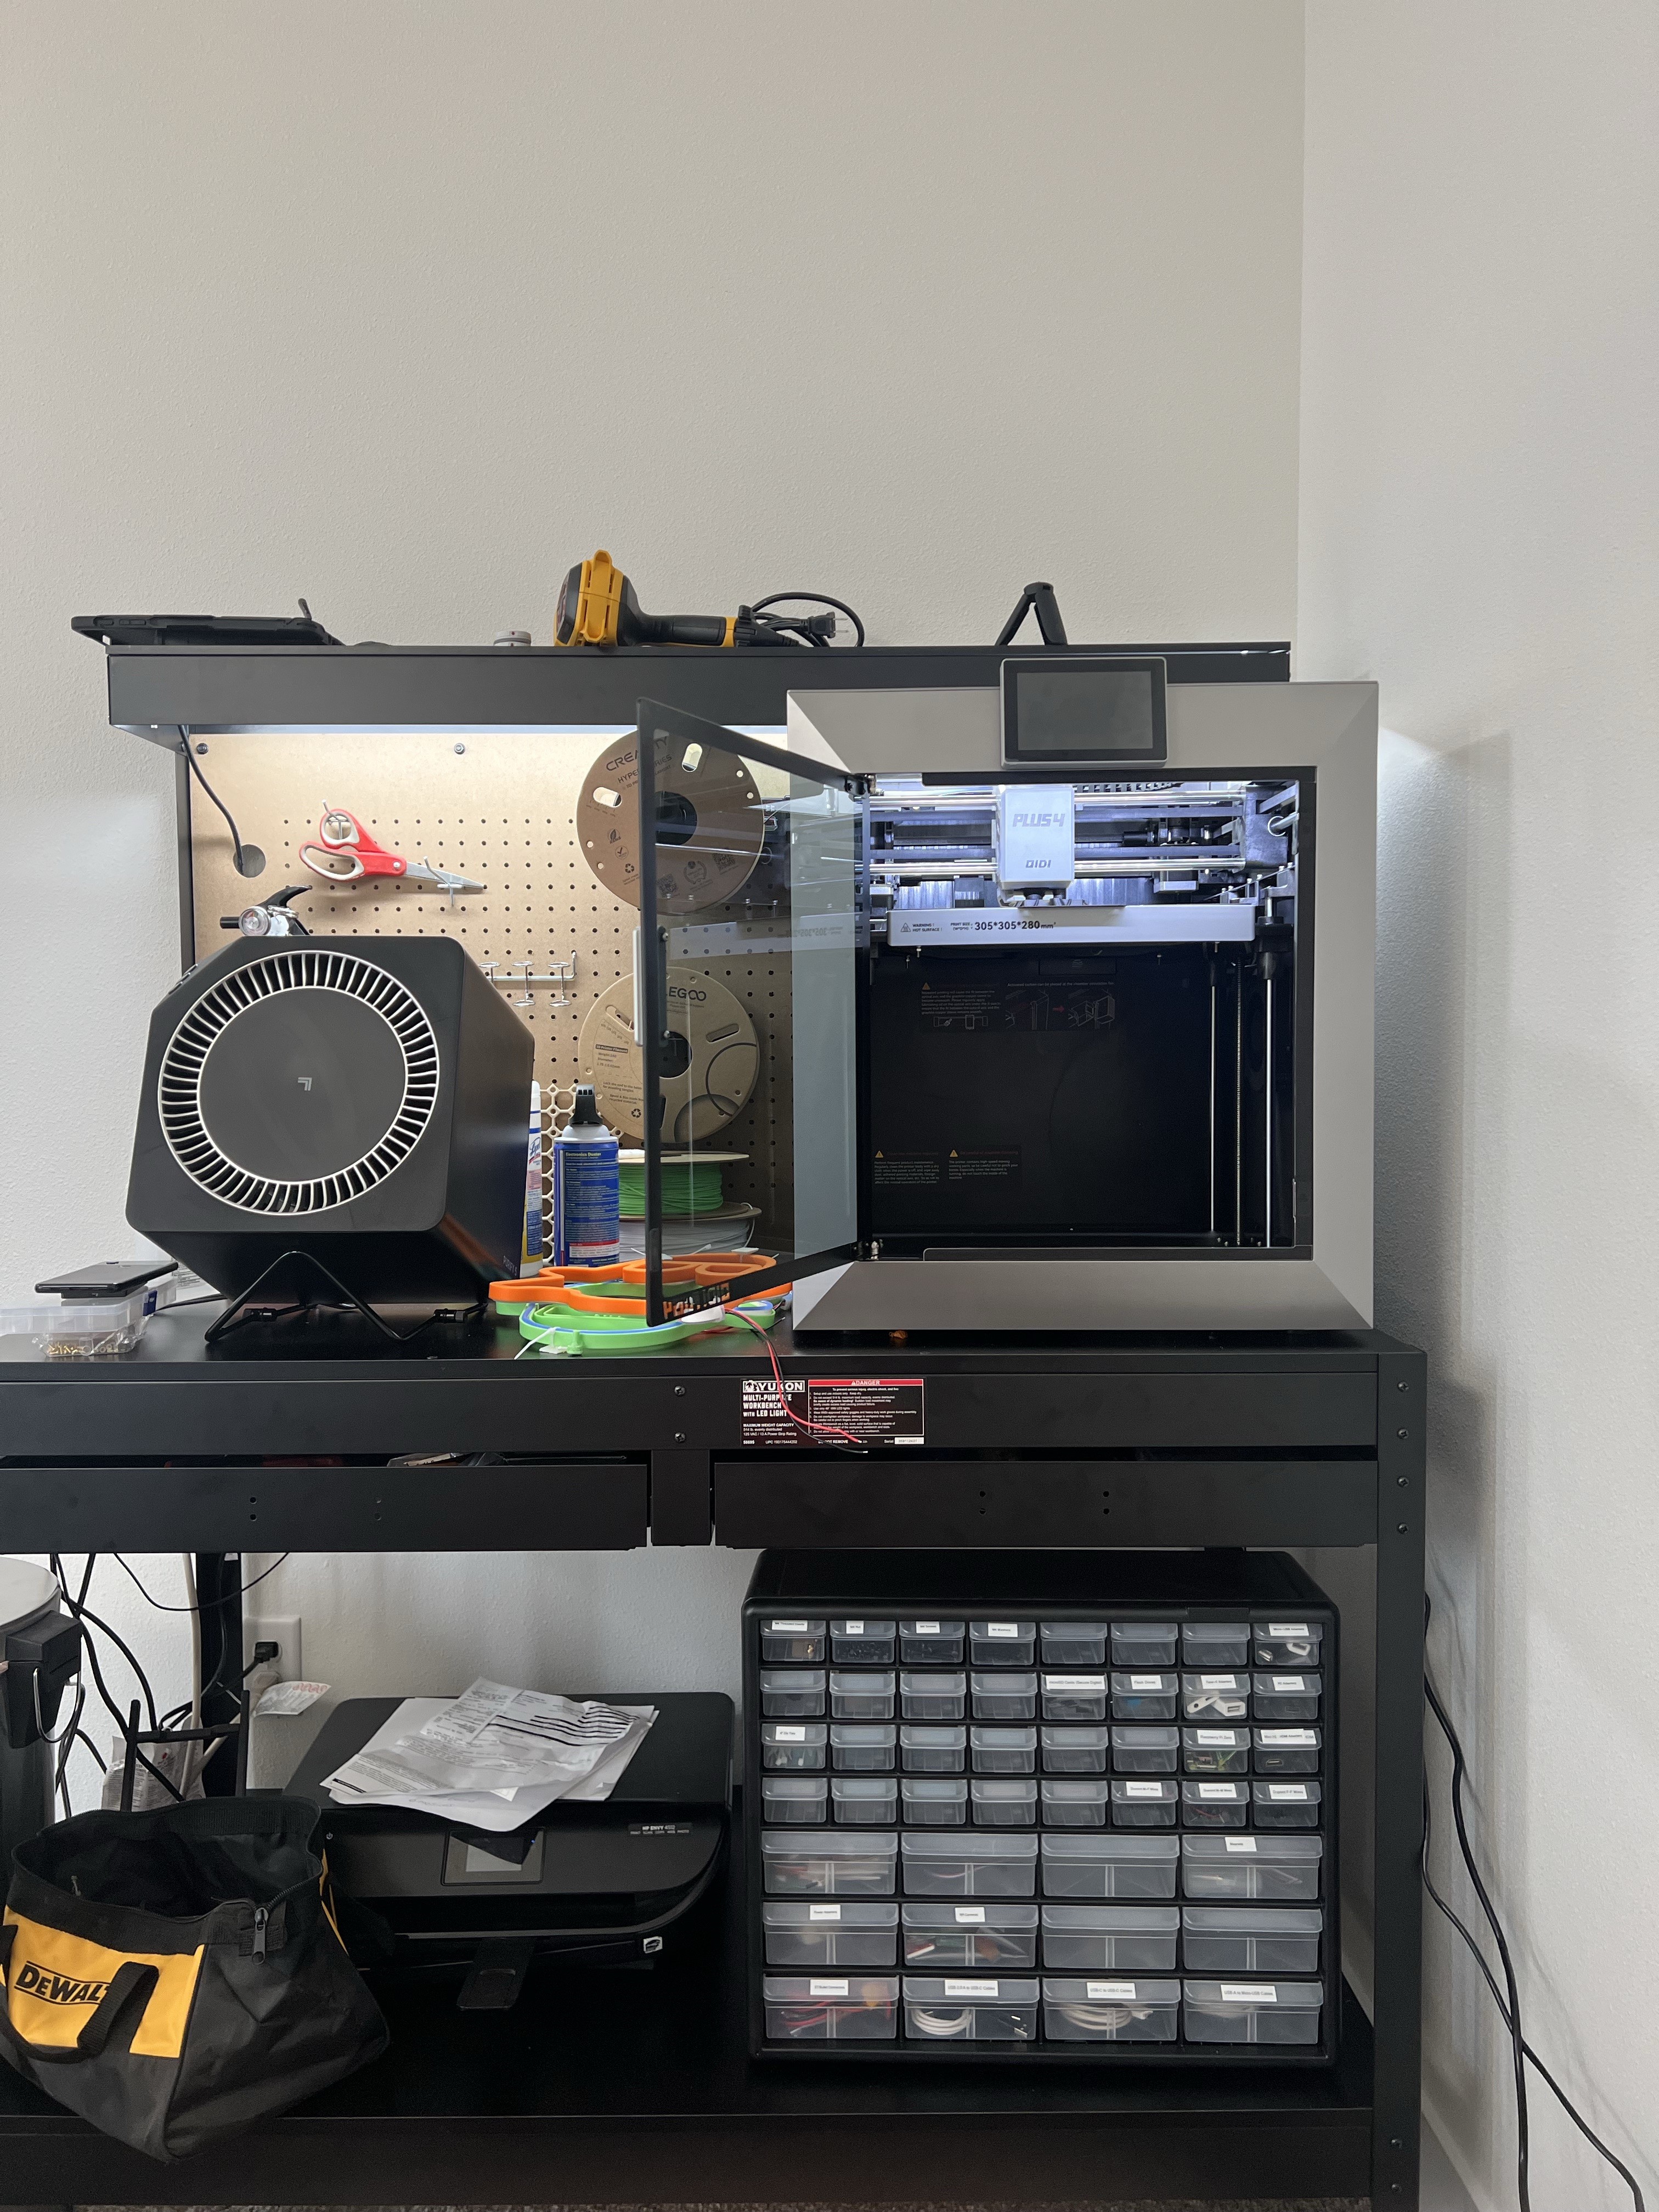
Upgrading from the Ender 3 Pro to the QIDI Plus 4 was an exciting step forward, but it introduced me to a new component of 3D printing technology. Having never used Fluidd or Automatic Bed Leveling (ABL) before, I knew I had to experiment. The transition from manually leveling a print bed to utilizing these advanced tools posed a change, albeit a welcomed one. After several calibration attempts, adjustments, and refinements, I achieved an acceptable variance in the range of the bed mesh. In this article, I’ll walk you through the step-by-step process that transformed my bed mesh from highly uneven to leveled.
The Initial Bed Mesh Reading
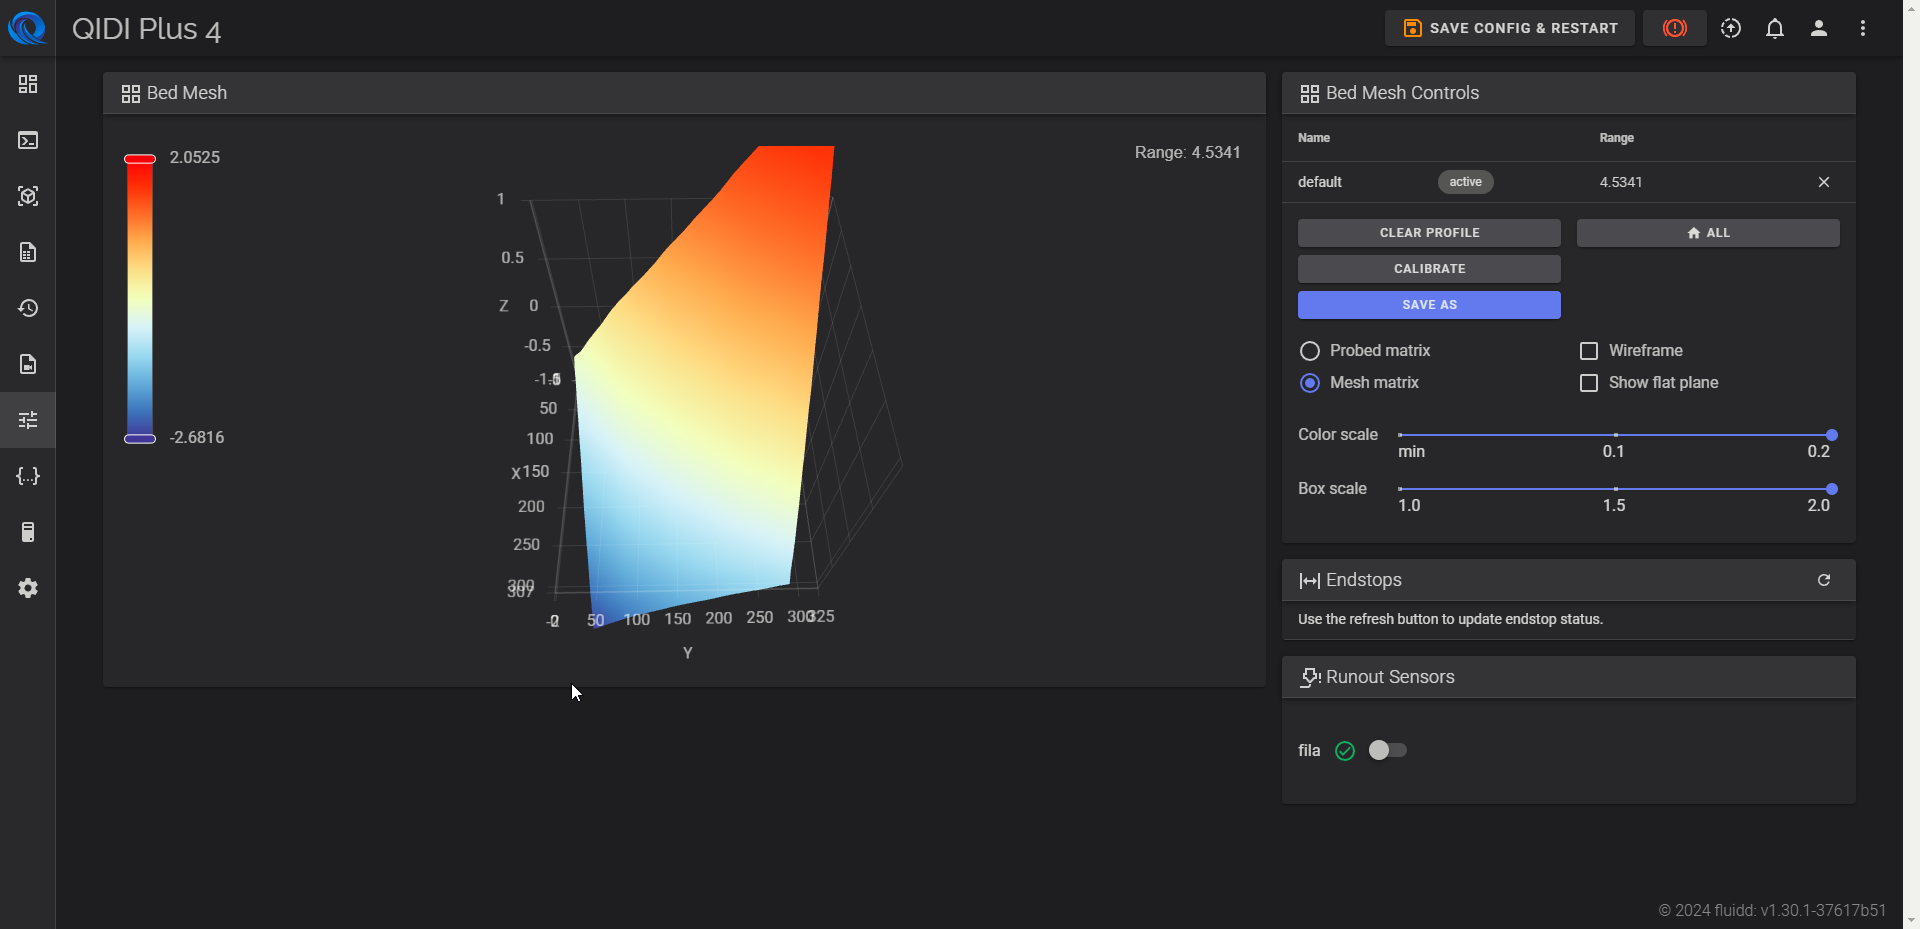
Upon starting the first calibration with Fluidd, the bed mesh data was clear—the bed was far from level. The range between the highest and lowest points was 4.5341, with the lower end at -2.6816 and the highest at 2.0525. This much variance was causing severe print issues, including poor adhesion and inconsistent first layers.
Step 1: First Adjustments and Hex Nut Corrections
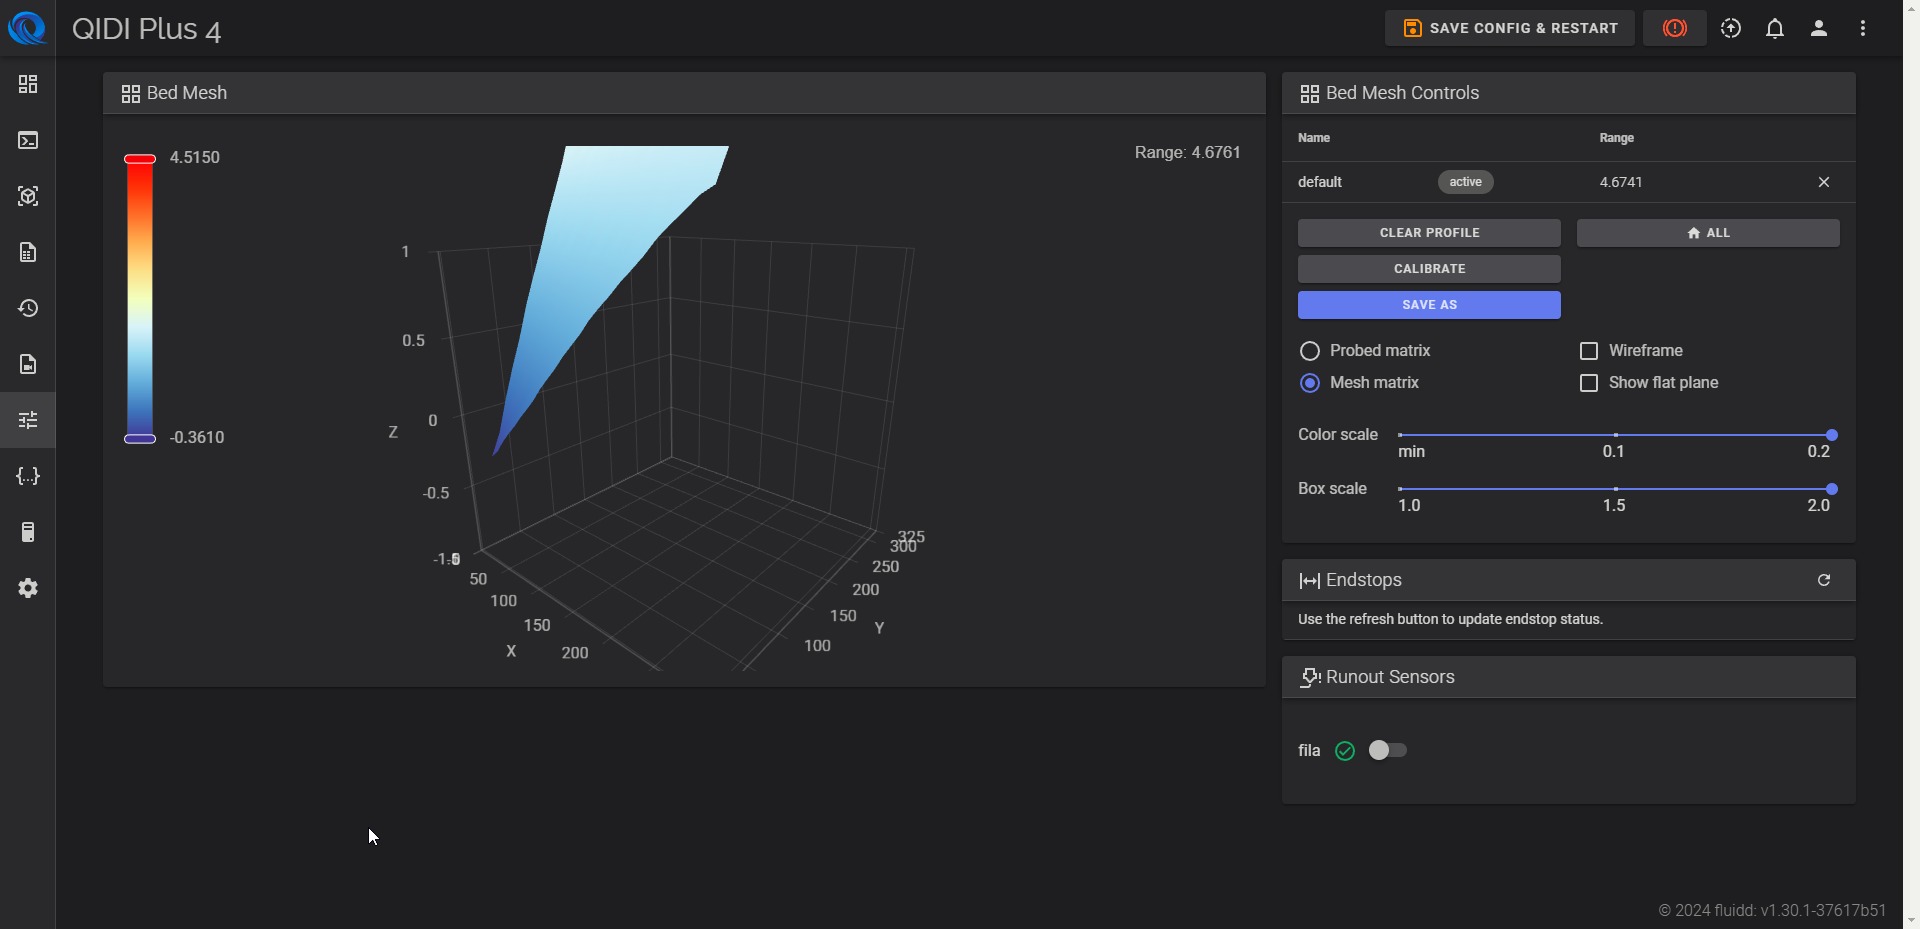
I started by focusing on the front right and back right corners, the highest points on the bed. My first instinct was to loosen these hex nuts to bring the bed down in these areas. After running the ABL calibration, the mesh improved slightly, but the range was still significant, increasing slightly to 4.6741.
Noticing the small improvement but the persistent issue, I realized I needed to focus on the back left corner, which was too low. I tightened this hex nut to raise that section of the bed.
Step 2: Incremental Tightening and Loosening
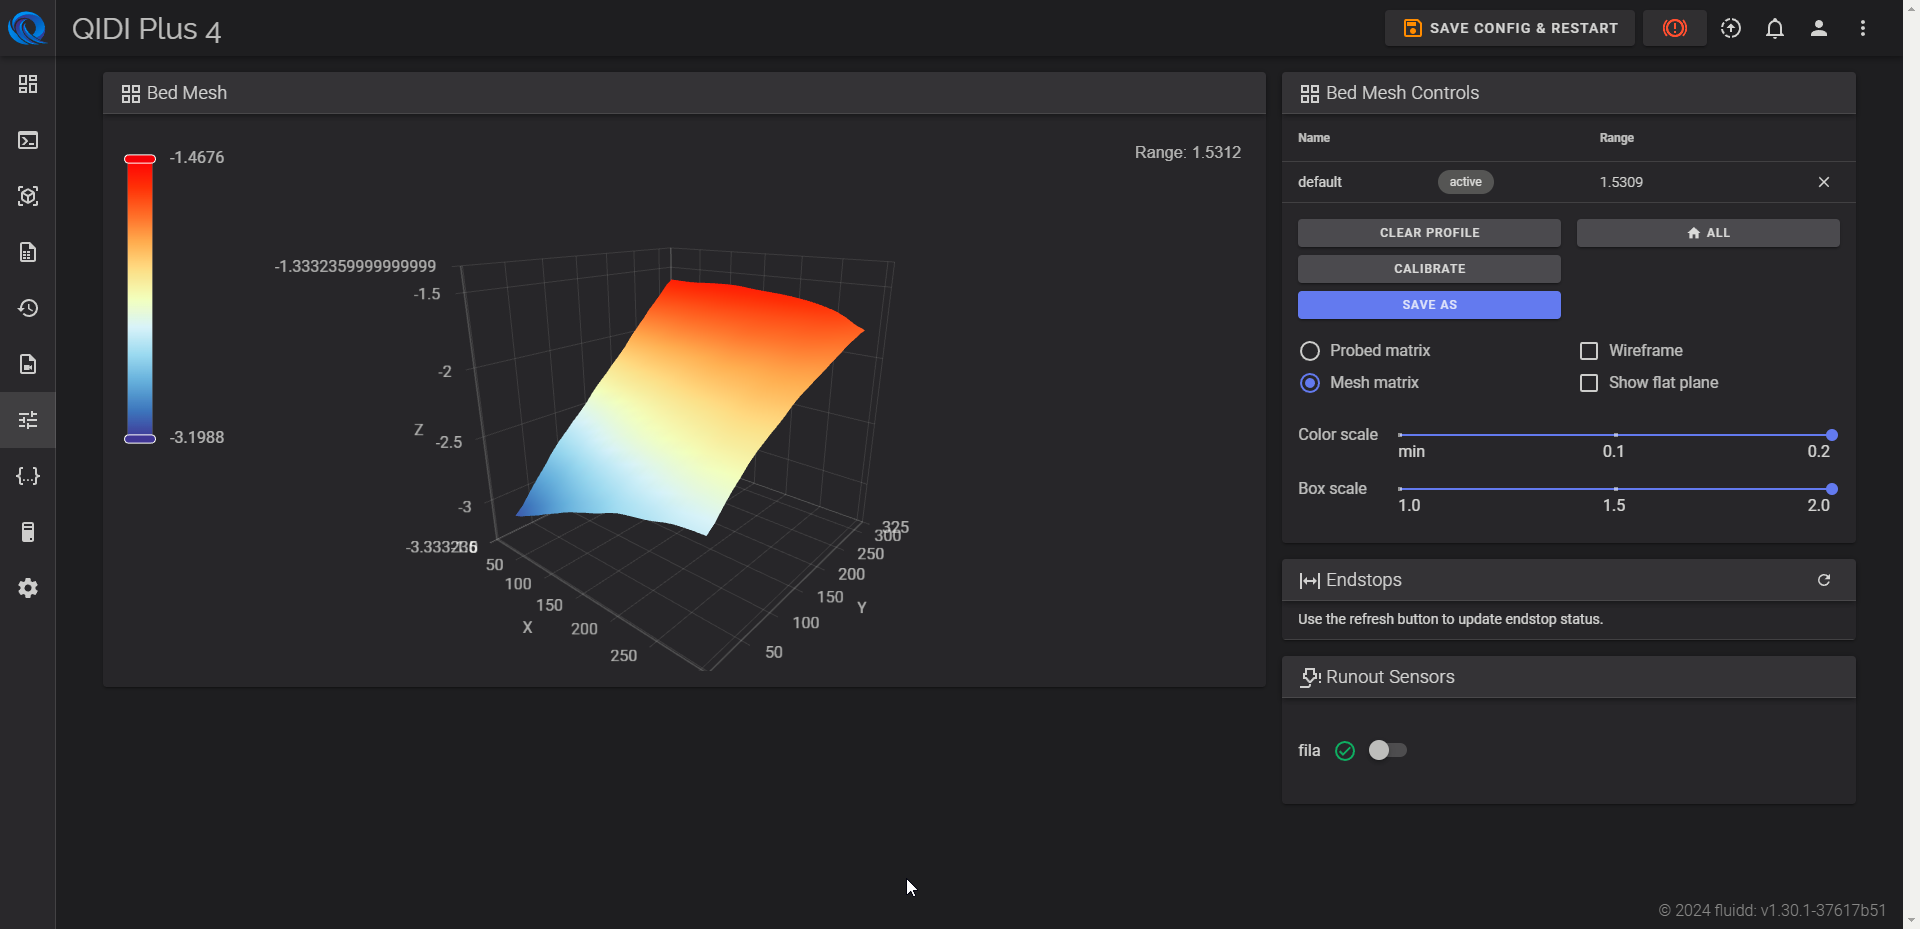
With small adjustments to the hex nuts, I saw a real difference. Using a methodical approach, I turned each hex nut 25 degrees at a time:
- I tightened the back right nut by four 25-degree turns to bring down the higher side.
- I then loosened the back left hex nut by two 25-degree turns to raise the lower corner.
These incremental adjustments began to close the gap, reducing the range between the high and low points and creating a more even bed. The bed mesh range was now at 1.5309—a significant improvement from where I started.
Step 3: Fine-Tuning the Bed Level
After each adjustment, I recalibrated the bed using Fluidd’s automatic bed leveling tool. The mesh had become much more balanced, but there was still room for improvement. I continued making small changes:
- I tightened the front left hex nut slightly to lower the high points.
- I continued loosening the back left hex nut to gradually raise the back left edge.
After each adjustment, I recalibrated and checked the bed mesh results to see how the bed was leveling out.
Step 4: Achieving a Bed Mesh Range Under 0.5
After multiple rounds of precise tightening and loosening, the bed mesh finally reached a balanced state with a range of 0.3913. The highest point on the bed was 1.1743, while the lowest was -0.5825. This marked a significant improvement from where I started, bringing the bed to an acceptable level. With a range under 0.5, the bed was now flat enough to provide a stable surface for consistent, high-quality prints.

Conclusion
By methodically tightening the hex nuts using a socket wrench with a 15 mm hex socket—R for tightening and L for loosening—and utilizing Fluidd’s automatic bed leveling tool to calibrate and check the bed mesh, I was able to greatly improve the levelness of my print bed. Achieving a balanced mesh allows for a consistent first layer, solving many of the adhesion and printing issues I had encountered earlier. Though the process requires time and attention, fine-tuning the bed level is essential for successful prints when using ABL technology. With patience and persistence, anyone can achieve a perfectly leveled bed mesh on their 3D printer.