Midjourney Automation Bot
Overview
The Midjourney Automation Bot is a groundbreaking, open-source project that leverages the capabilities of OpenAI's GPT-3 model for automated image generation. This tool is specifically designed to interact with Discord channels, enabling users to create a wide array of art forms such as illustrations, digital paintings, or sketches through simple text prompts. It stands out for its ease of use, making it a valuable asset for artists, developers, and enthusiasts in the realm of automated image generation.
Key Features
- Automated Discord Interaction: The bot is programmed to autonomously interact with Discord channels, streamlining the process of sending and receiving image generation commands.
- User-Defined Prompts: Users can input custom prompts to guide the image generation process, offering a high degree of creative control.
- GPT-3 Integration: Utilizing OpenAI's GPT-3 model, the bot can interpret prompts and generate corresponding images with remarkable accuracy and creativity.
- Customizable Upscale Options: The bot includes options for upscaling the generated images, allowing users to enhance image quality according to their needs.
- User-Friendly Web Interface: Equipped with a web interface, the bot offers an intuitive platform for users to interact with and control its functions.
- Robust Logging: The bot maintains detailed logs of its operations and any encountered errors, ensuring transparency and ease of troubleshooting.
- Open Source and Customizable: Released under the MIT License, the bot encourages broad usage and modification, catering to a wide range of applications and user modifications.
Setup Guide
Step 1: Clone the Repository
- Open your command line interface (CLI).
- Navigate to the directory where you want to clone the repository.
- Run the following command:
git clone https://github.com/passivebot/midjourney-automation-bot.git - This will create a copy of the repository on your local machine.
Step 2: Install Dependencies
- Ensure you have Python and pip installed on your machine. If not, download and install Python from python.org. Pip is included automatically.
- Navigate to the directory of the cloned repository in your CLI. Use the
cdcommand to change directories. For example:bash cd midjourney-automation-bot - Once in the directory, run the following command to install the required dependencies:
pip install -r requirements.txt - This command will install all the Python packages listed in the
requirements.txtfile.
Step 3: Set the OpenAI API Key in the Environment Variable
- You need to have an OpenAI API key. If you don't have one, you can obtain it from the OpenAI API portal.
-
Setting the environment variable depends on your operating system.
-
For Windows:
- Open Command Prompt or PowerShell.
- Run the following command (replace Your_API_Key with your actual API key):
setx OPENAI_API_KEY "Your_API_Key" - Restart your CLI to apply the changes.
-
For macOS/Linux:
- Open Terminal.
- Add the export command to your shell profile file (like .bashrc, .zshrc, etc.). For example, if you're using bash, you can run:
echo 'export OPENAI_API_KEY="Your_API_Key"' >> ~/.bashrc - Replace Your_API_Key with your actual API key.
- Apply the changes by running source ~/.bashrc (or the respective file for your shell).
Usage Guide
Step 1: Open Discord
- Open your browser and go to Discord.
- Log in to your Discord account.
- Navigate to the channel where you've added the Midjourney Discord bot too and copy the URL of the channel.
Step 2: Start the Bot
- Open your CLI and navigate to the directory of the cloned repository.
- Run the following command: python main.py
- This will start the bot and open a new browser window with the GUI.
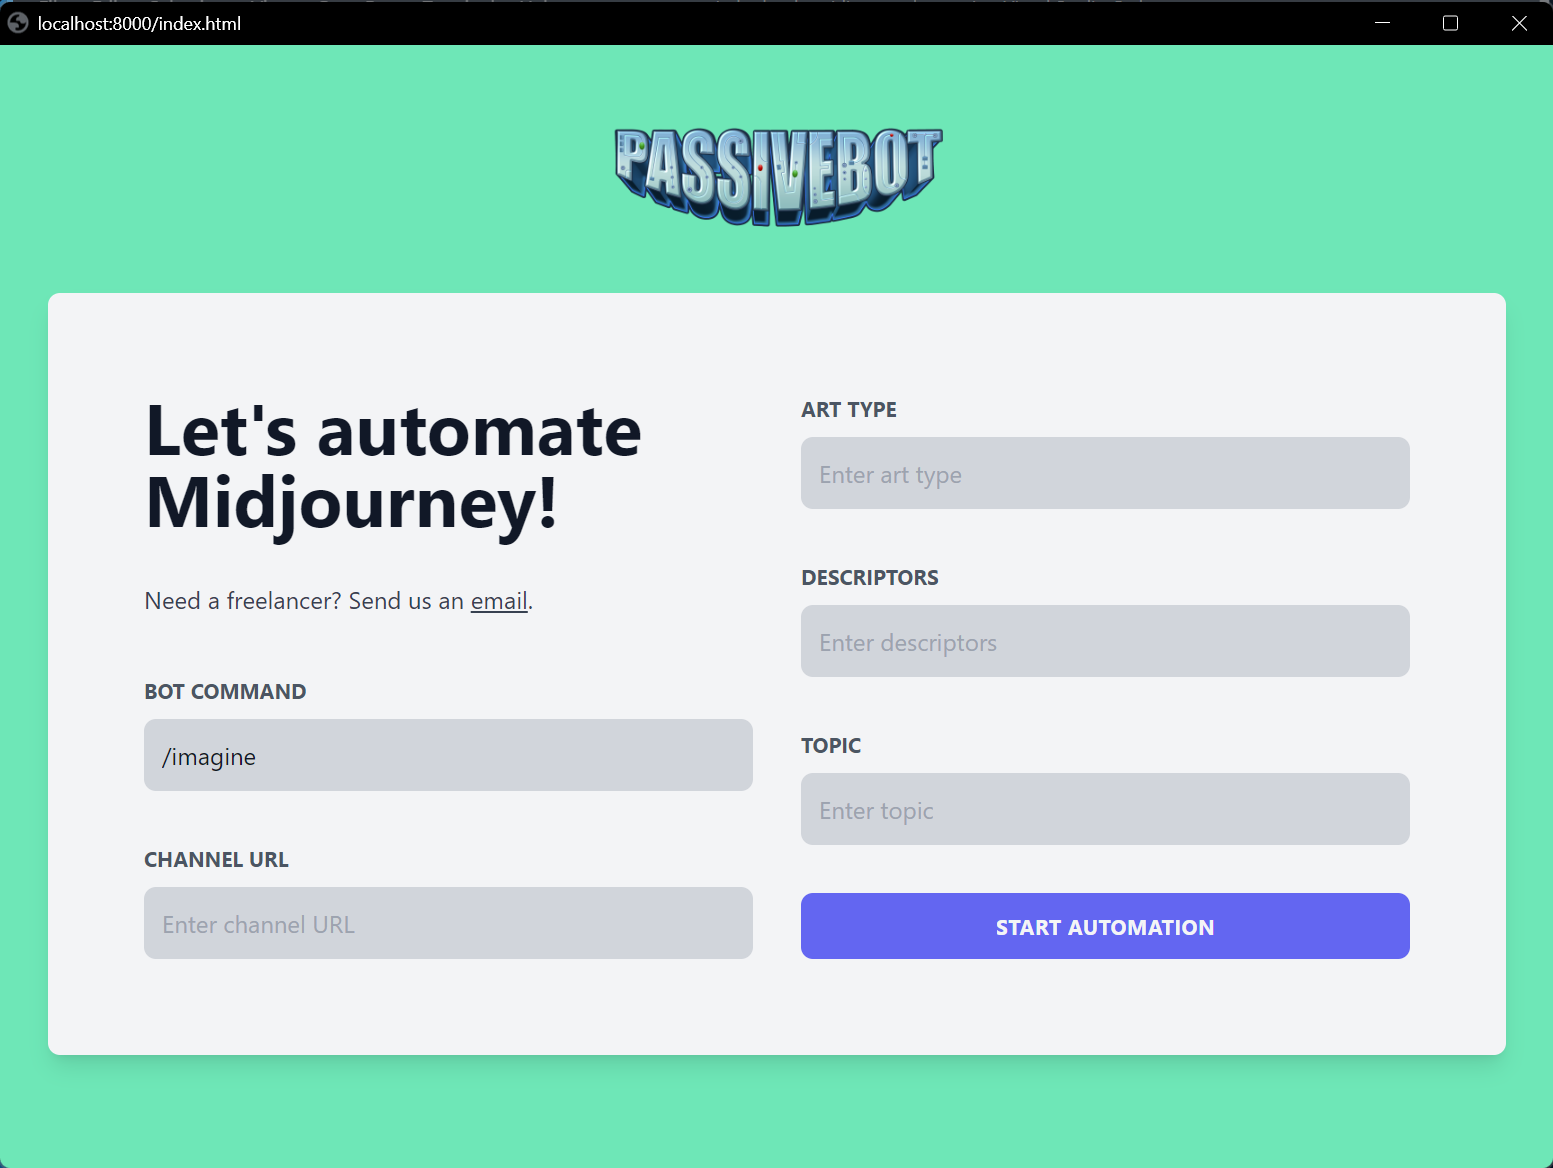
- Enter the required details including the Discord channel URL, the bot command, the art type, the descriptors, and the topic.
- Click on the Start Bot button to start the bot.
- The bot will now start generating ten images in the specified channel, upscale them, and download them to your local machine.
Last update: February 5, 2024
Created: February 5, 2024
Created: February 5, 2024